KAMAKAZEE
Full Member
 RIDE HARD RIDE FREE
Posts: 196
|
Post by KAMAKAZEE on Sept 17, 2012 10:42:40 GMT -5
Next is a triangular gusset at the front of the seat rails. It tidies the area and allows the seat to have a rounded front. Underneath we'll provide a place for a couple of hidden switches.. 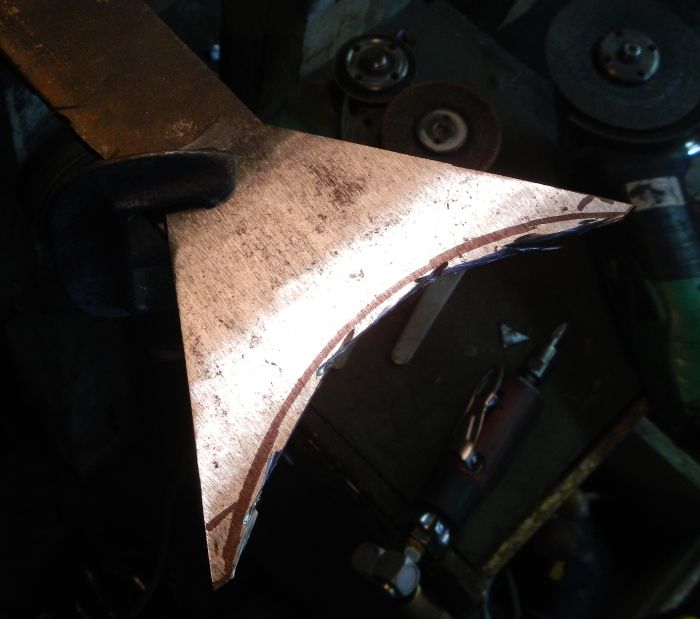 Gusset beng set up for welding. Clamps stop it sliding back and the flat bar across the top is to get the top of the gusset level with the top of the rails... 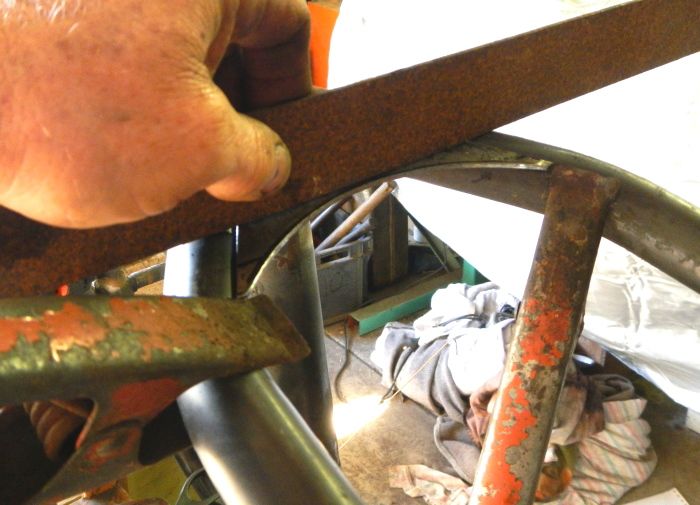 Both pieces have been welded in with the Henrob... 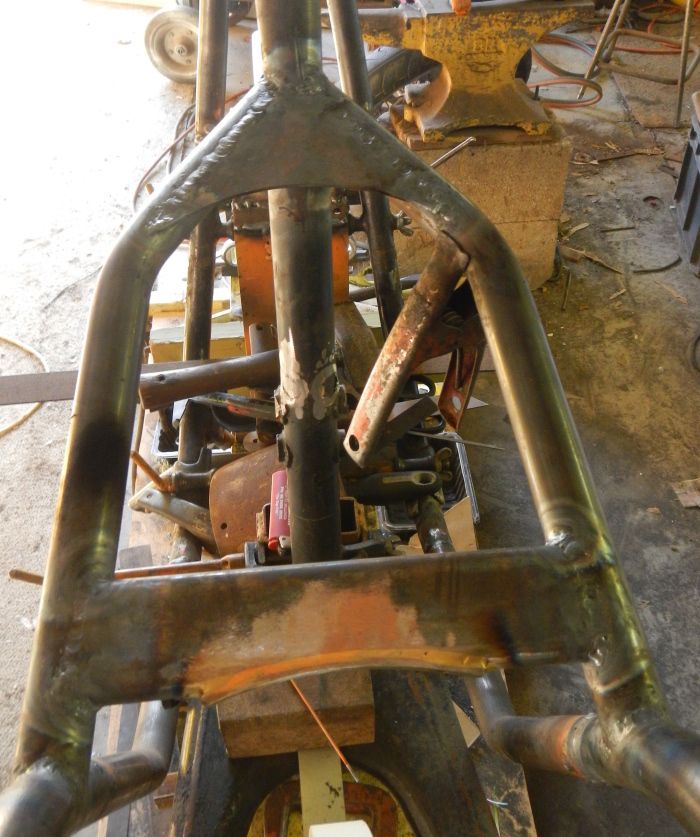 |
|
KAMAKAZEE
Full Member
RIDE HARD RIDE FREE
Posts: 196
|
Post by KAMAKAZEE on Sept 17, 2012 10:49:35 GMT -5
To add some strength to the gusset and to provide for the switches a piece of 20 x 3 is curved in the vice. Measuring for the switch holes begins with finding centre and using a tailor's tape measure to measure accurately around the curve. Nick your missus' tape or be brave and go to Spotlight... 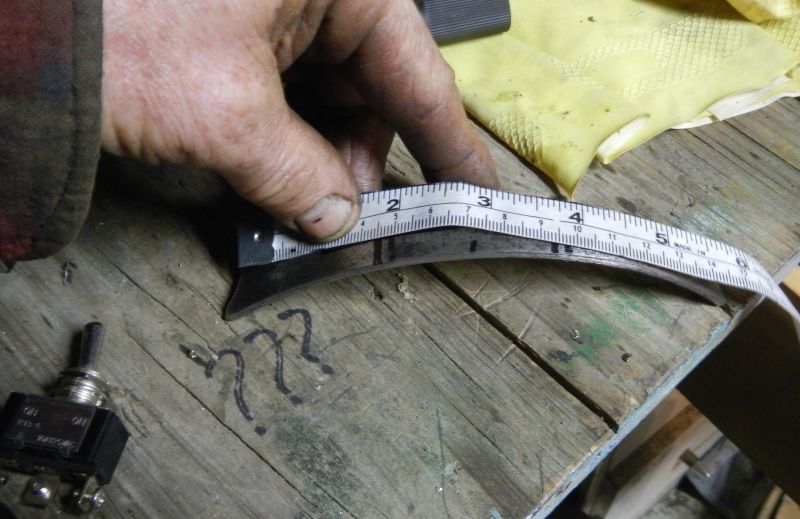 Heres' how the switches can fit... 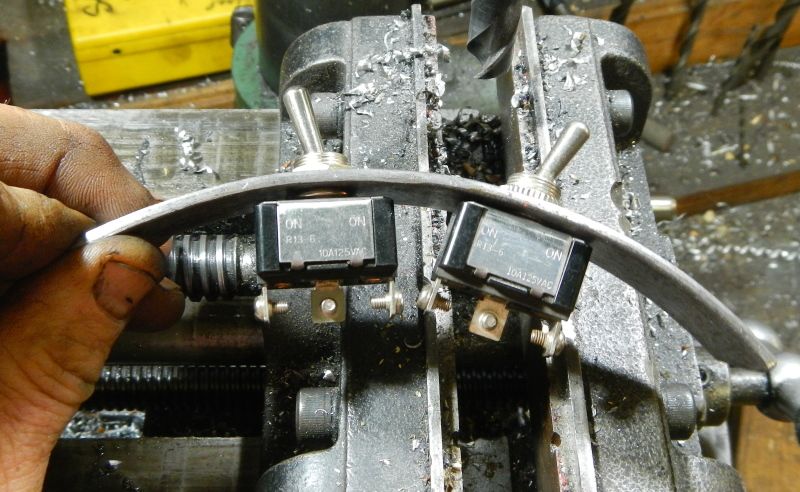 Gusset and guard mount done 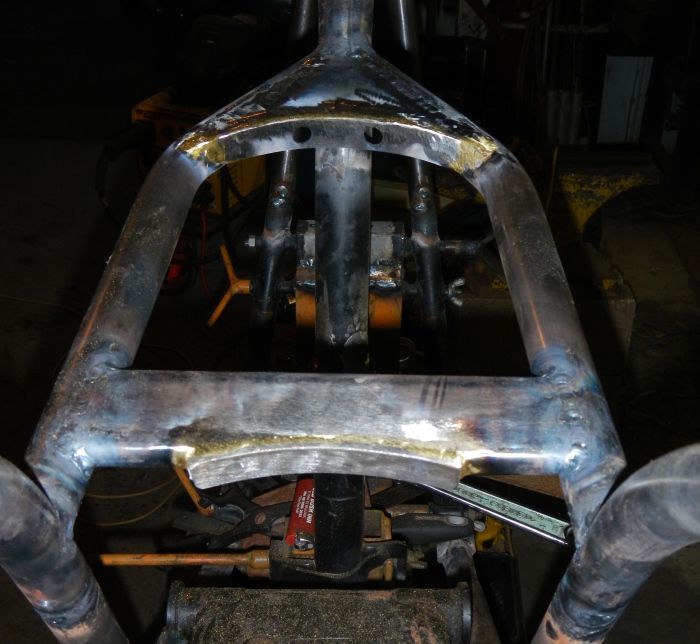 I have measured up for the swingarm mounts and we will get them machined up and hopefully mounted next. Then machining four shocker mounts and we can put it down the ground to finish some of the welding and mount the front end and rear wheel to do the final mount for the rear guard. |
|
KAMAKAZEE
Full Member
RIDE HARD RIDE FREE
Posts: 196
|
Post by KAMAKAZEE on Sept 17, 2012 11:07:35 GMT -5
We machined up a couple of bushes for the swing arm pivot. They are different lengths because the stock frame is offset.  Rear of the swing arm has had some brackets added which we will remove along with the original bottom shock mounts... 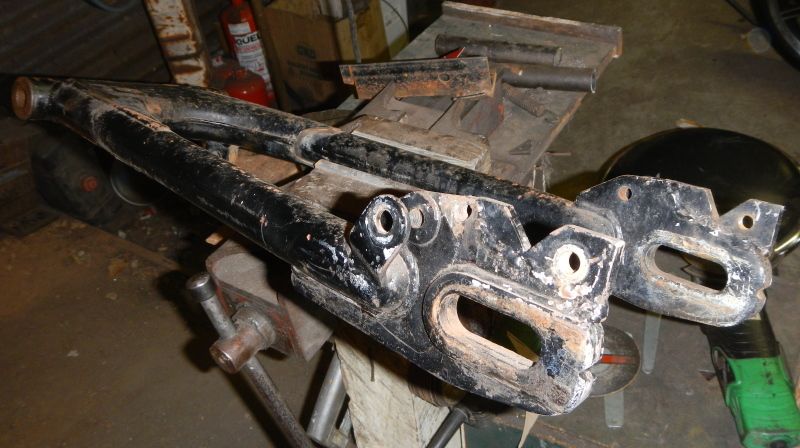 New bottom shocker mount is lower and much neater and also allows the shocker to mount neatly on the frame member as well, so shocker doesn't have to be shortened. Mounting difficult shapes like this swing arm is helped by lots of blocks of aluminium and steel and some G clamps. 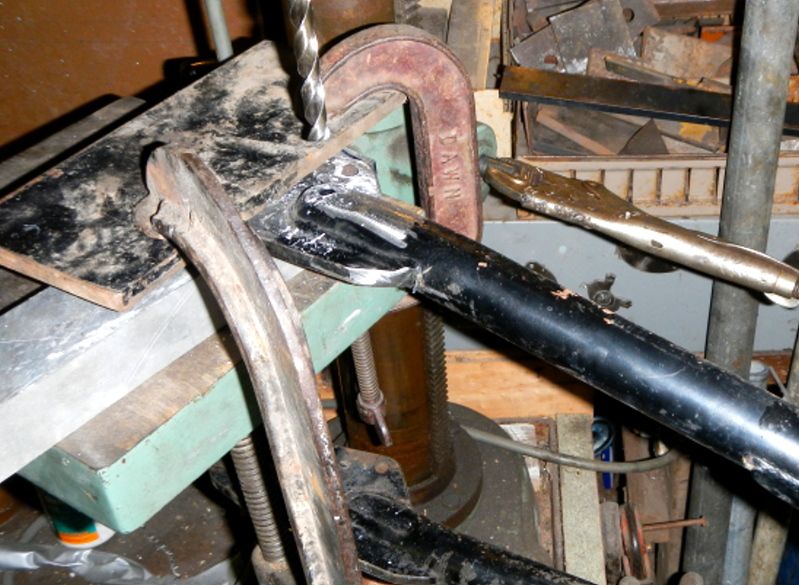 |
|
KAMAKAZEE
Full Member
RIDE HARD RIDE FREE
Posts: 196
|
Post by KAMAKAZEE on Sept 17, 2012 11:11:33 GMT -5
High tensile M10 bolts are trimmed down with angle grinder and welded on the inside of the swing arm... 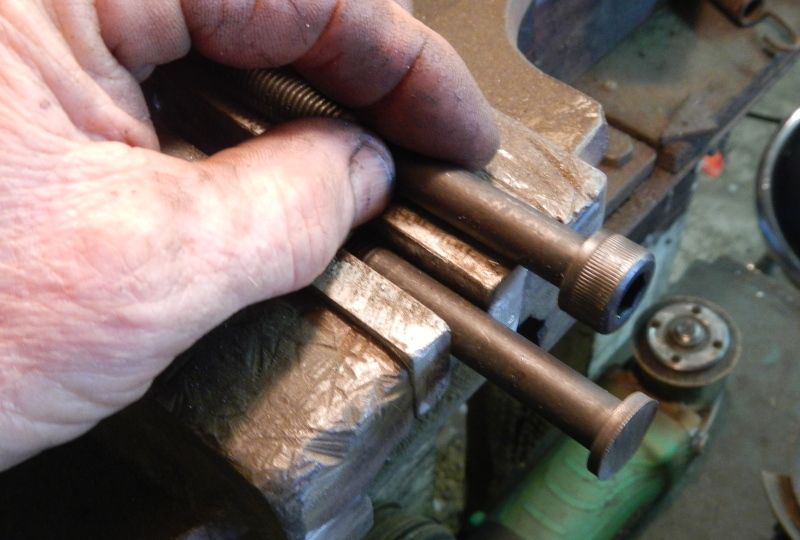 A thick washer is welded onto the outside of the swing arm but no weld on the bolt shaft to keep it strong. A machined collar tightend with a nut is used to keep it square while being welded... 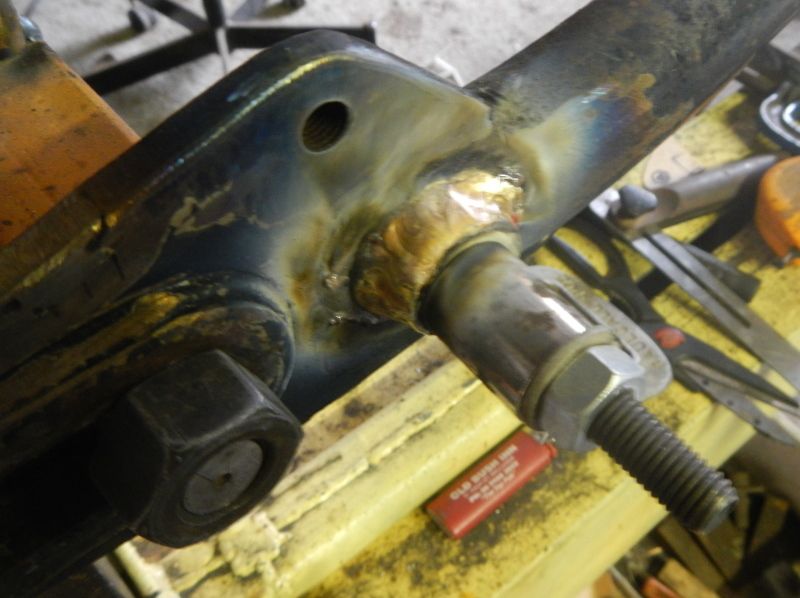 Top shocker mounts are machined and tapped for M10, then measured up for square and welded in... 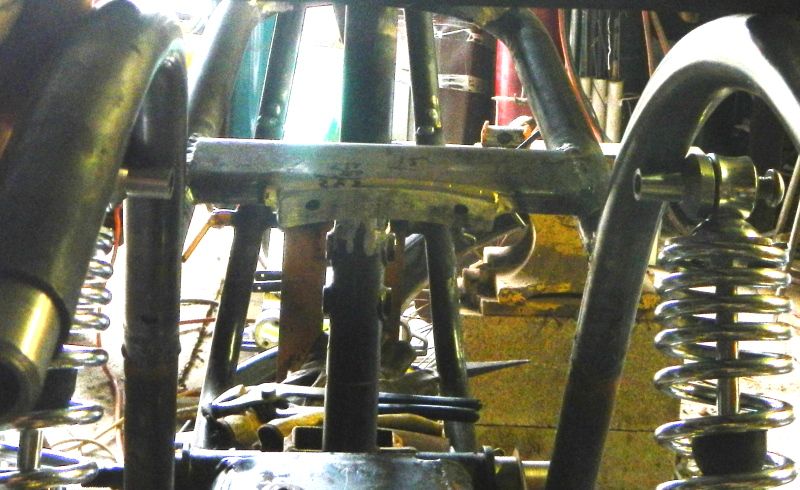 |
|
KAMAKAZEE
Full Member
RIDE HARD RIDE FREE
Posts: 196
|
Post by KAMAKAZEE on Sept 17, 2012 11:18:53 GMT -5
Now for the swingarm mounts. Quite a bit of thought went into best shape and angle to combine strength and good looks. Carboard pattern is made first and then the outer shape is cut out, ground and linished and then holes cut with a hole saw. Note that hole saws cut larger than their nominated size. Two pieces are cut and drilled at a time (held together with a G clamp on angle iron. 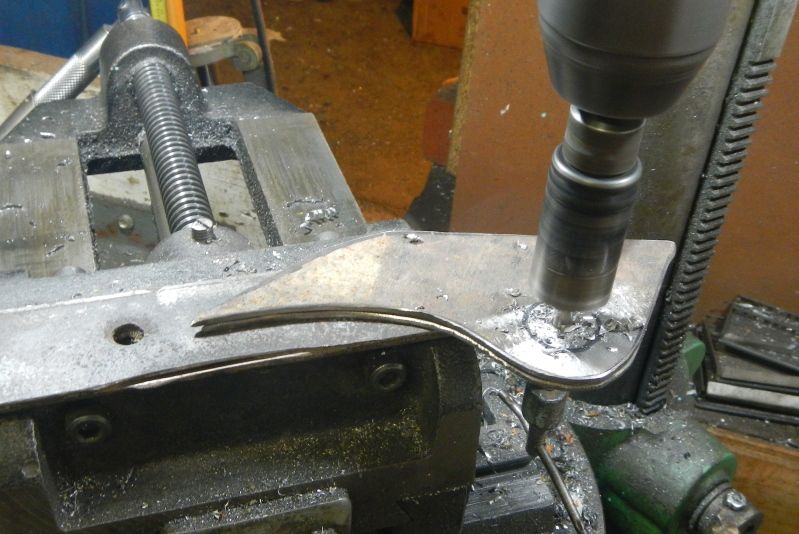 Inner plates are tacked welded with constant realignment as weld pulls considerably. I had briefly considered 10mm plate but this set up I think will be more rigid and put less stress on the frame tubes. 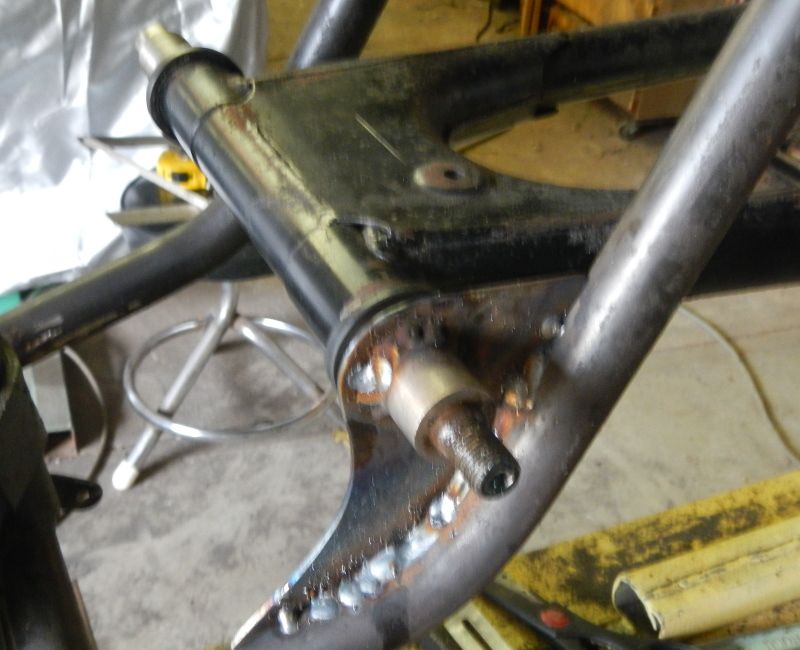 15mm flat bar bent to shape in the vice... 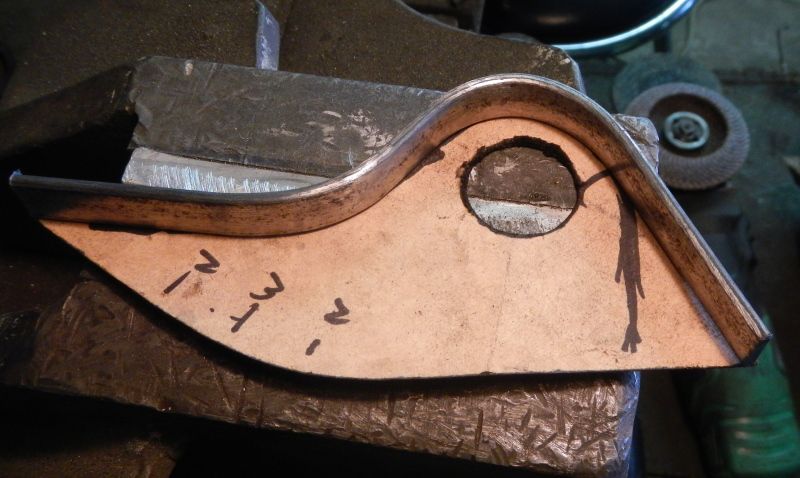 ... and set in ready for welding. Once again welding pulls a lot and we put the axle though each side to a time and see how well the pivot bolt lines up and then wome wallops with a hammer to get it lined up. Pivot slides in nicely... 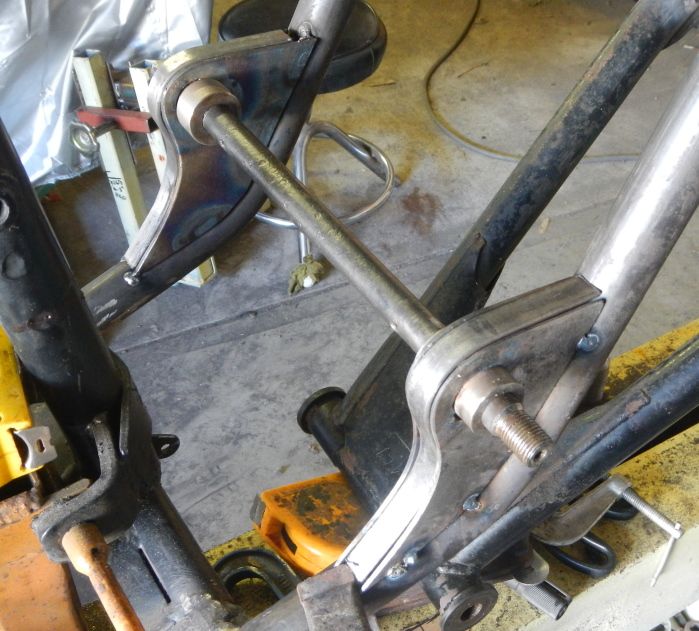 |
|
KAMAKAZEE
Full Member
RIDE HARD RIDE FREE
Posts: 196
|
Post by KAMAKAZEE on Sept 17, 2012 11:26:05 GMT -5
Not completely welded but good enough to set up so we can see how close we came to our plans... 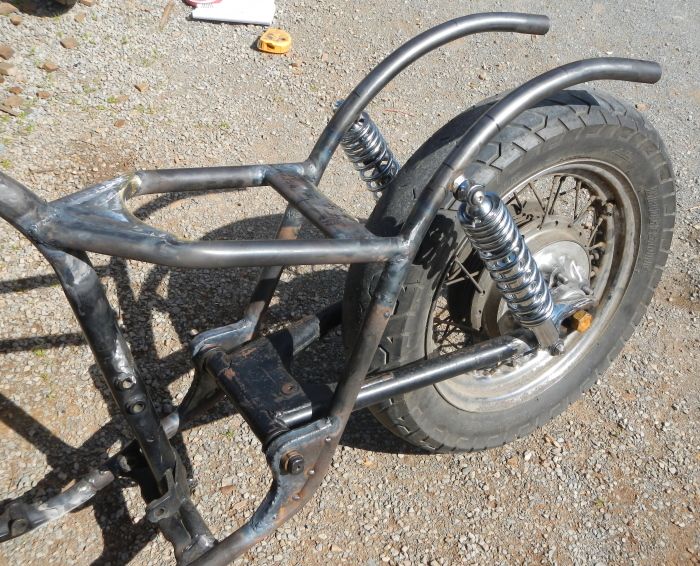 I reckon she looks good... 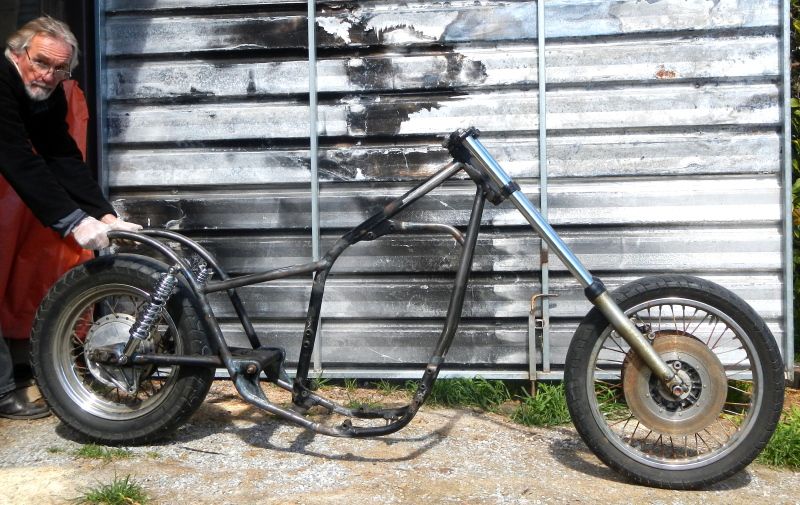 A few statistics... Forks are 8" overs, Rake 43 degrees, a couple of inches past 550 rule, Wheelbase 5'9 1/4", height of lowest point of seat rails 20", Ground clearance unladen 5". When fully built will be about 4"... although the springs seem unusually soft and may need to be put on a slightly harder adjustment. 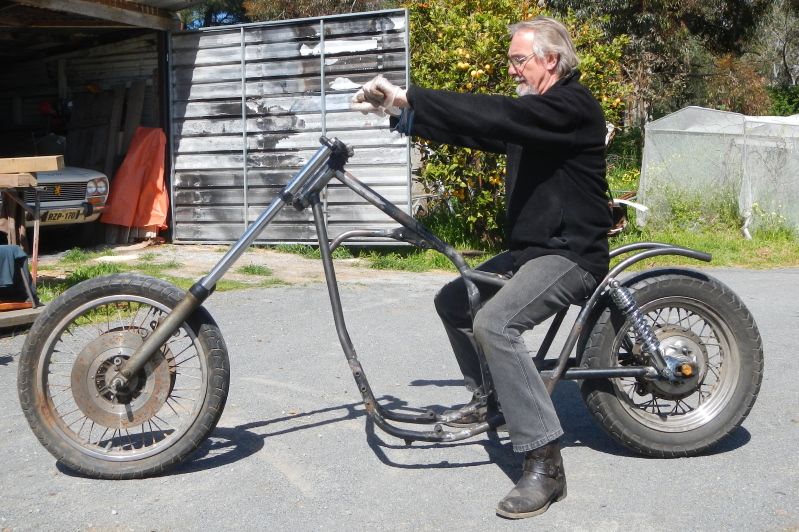 |
|
KAMAKAZEE
Full Member
RIDE HARD RIDE FREE
Posts: 196
|
Post by KAMAKAZEE on Sept 17, 2012 11:40:23 GMT -5
Well, the next step is to set up the side stand. KAMAKAZEE has sent down the ugly stubby original plus a nice long slim one off an old rigid frame. It looks just the ticket. Up front seems the best place if we are to have ground and pipe clearance... 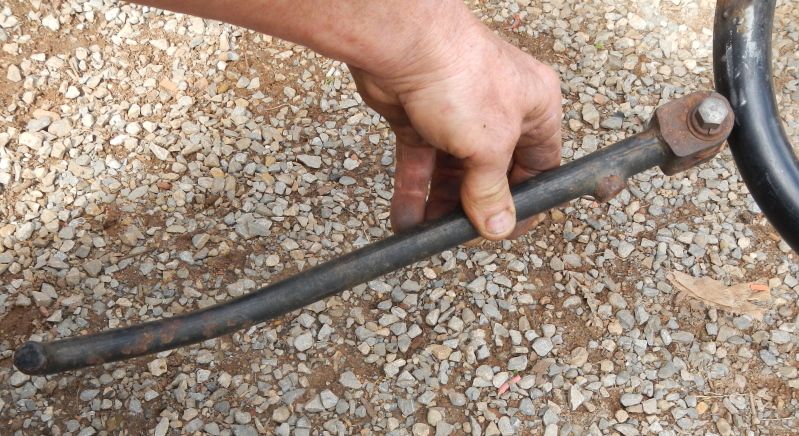 The original is held with a bolt, nut and spring washer. I think we can do better. 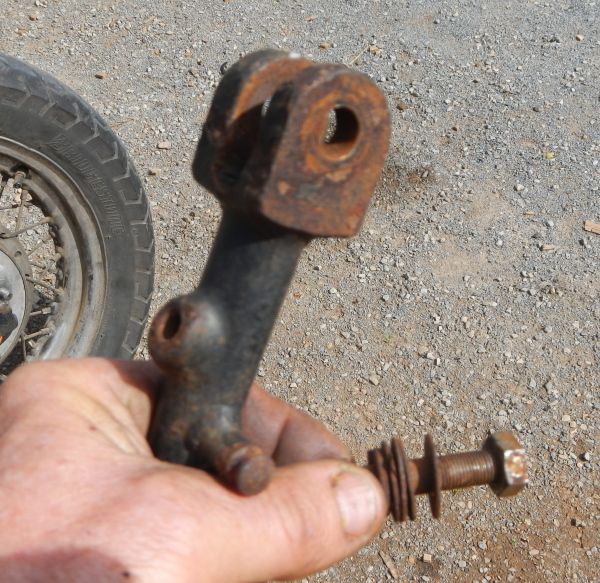 We'll linish off the casting marks and the small stop screw boss, and tap a thread in on one side and drill out the other so we can use a button head bolt underneath. This will not only look better, but be stronger and allow the spring to be a bit closer to the stand. On a Jap bike I like to use metric fasteners, but in this situation the existing hole is too large to tap a 12mm thread, so we will tap a half inch UNC instead. 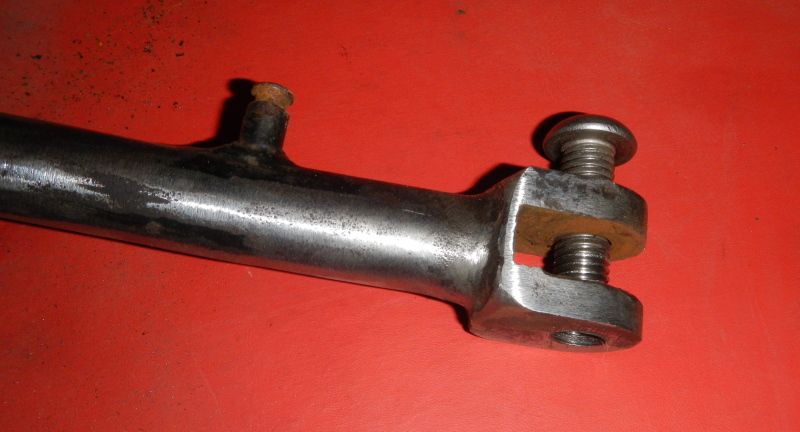 There are a number of considerations when mounting your side stand. Top Diag... The bike needs to be set up with a decent lean so that on uneven ground the bike will not fall over. It also needs to be forward of centre so the bike will not roll forward off the stand. Then the stand needs to fold back without fouling the exhausts or hitting the ground when cornering or going over spoon drains etc It also needs to be easily accessable by your left boot without leaving melted rubber on you lovely shiney exhaust. Bottom Diag... the spring needs to hold the stand securely forwards as well as when the it is retracted. the is accomplished by setting up the spring anchoring pin so in an "over centre" position... Note how the spring crosses over the centre of the stand pivot when it swings to the two positions. This all takes some trial and error and experimenting. 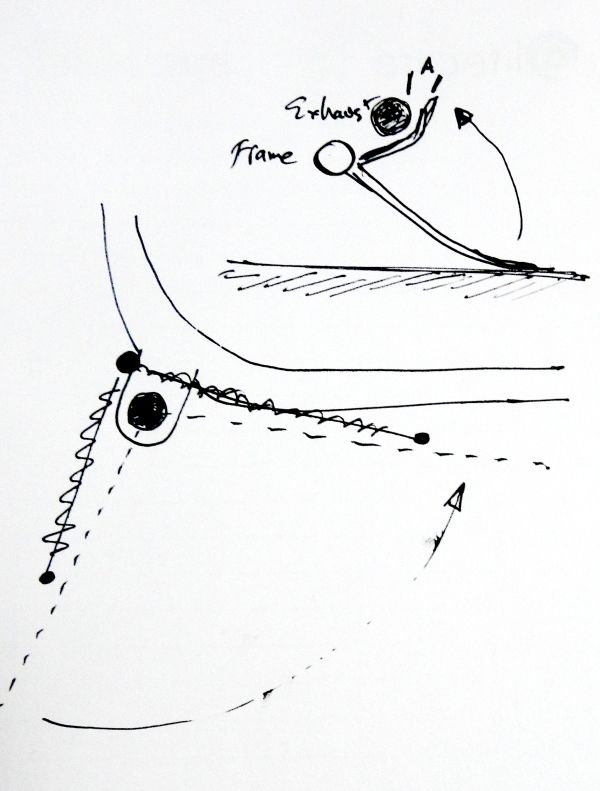 The stand tab is made from some 12mm steel that is a close fit and will reduce wobble and also be nice and strong. When attaching tabs that carry a lot or weight, spread their attachment area over as wide an area of the frame as you can to save the tab rippiing out of the thin frame tubing . the front side of the tab is squaerd off to stop the stand swinging too far forwards. 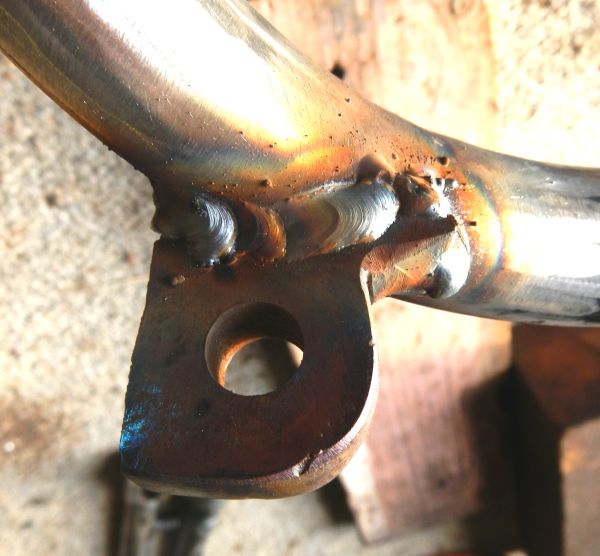 |
|
KAMAKAZEE
Full Member
RIDE HARD RIDE FREE
Posts: 196
|
Post by KAMAKAZEE on Sept 17, 2012 11:45:50 GMT -5
Spring anchor is machined out of some 8mm round bar with a groove to hold the spring. 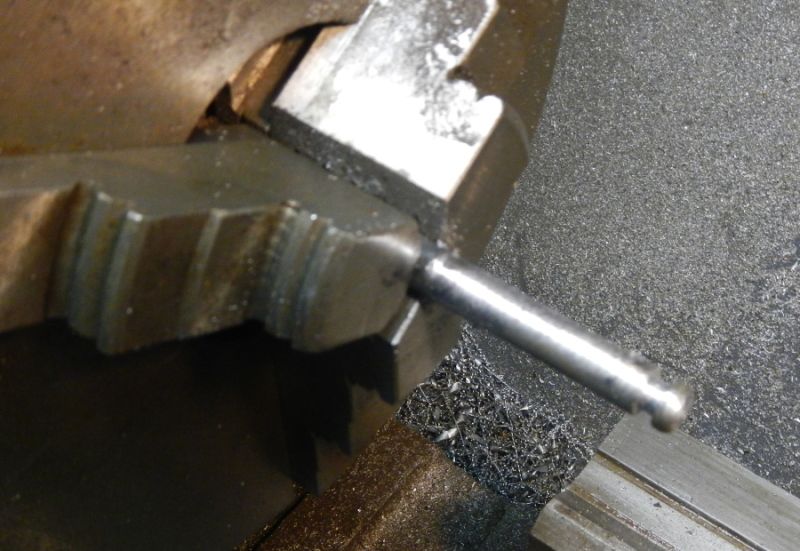 Anchor is bent forwards a bit to increase the 'over centre effect forwards". Spring is from my collection. A dome nut will act as a lock nut on the stand pivot bolt. 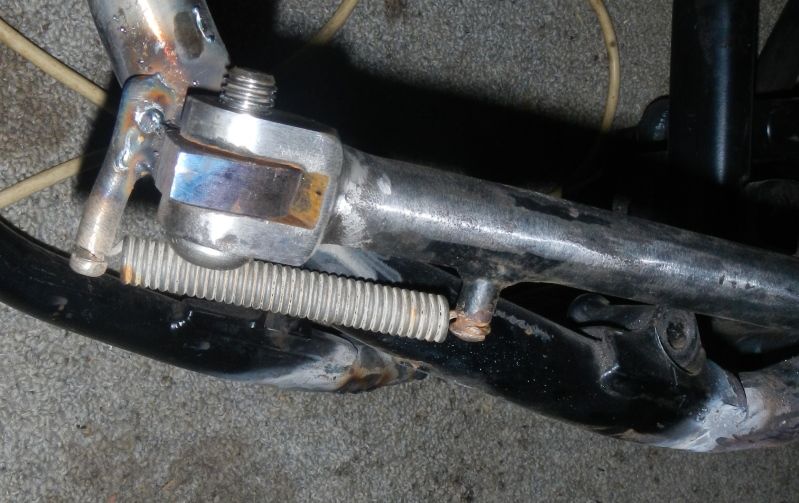 Finished... nice lean on the bike, stand opens and retracts easily without any ground clearance problems... 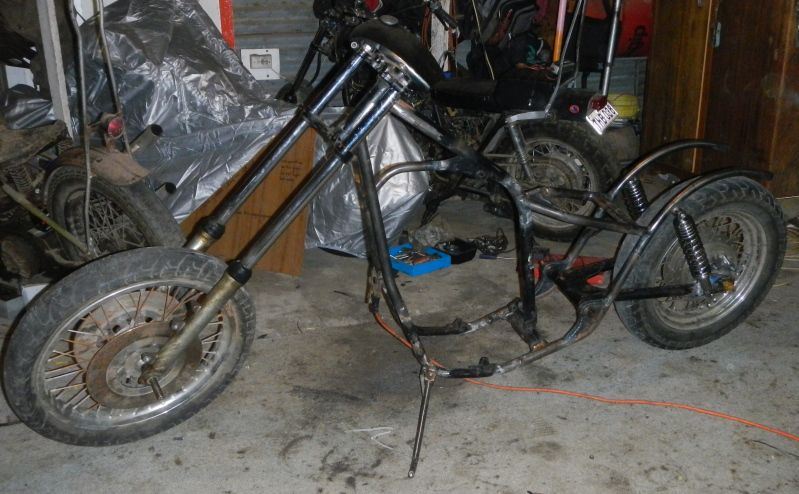 |
|
KAMAKAZEE
Full Member
RIDE HARD RIDE FREE
Posts: 196
|
Post by KAMAKAZEE on Sept 17, 2012 12:05:37 GMT -5
We spent a bit of time on the phone today throwing around ideas re exhaust pipes. KAMAKAZEE has sourced an unchromed set of 'stock' header pipes at a better price than I can make them, He will get them chromed later. He was wanting a set of cocktail mufflers, but after a bit more thought he settled on a set of turn out mufflers the same as this... 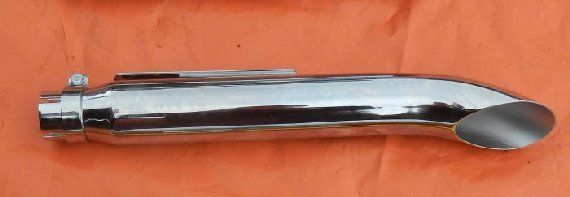 |
|
KAMAKAZEE
Full Member
RIDE HARD RIDE FREE
Posts: 196
|
Post by KAMAKAZEE on Sept 17, 2012 12:09:04 GMT -5
More pictures to follow as the build progresses  |
|
|
|
Post by G Man on Sept 19, 2012 21:10:55 GMT -5
More pictures to follow as the build progresses Great pics and thread Kamakazee! Look forward to more.  G Man |
|
KAMAKAZEE
Full Member
RIDE HARD RIDE FREE
Posts: 196
|
Post by KAMAKAZEE on Sept 20, 2012 0:58:19 GMT -5
More pictures to follow as the build progresses Great pics and thread Kamakazee! Look forward to more. G Man Thanks mate |
|
|
|
Post by XS Rod on Sept 20, 2012 8:54:39 GMT -5
Definitely intense... I did a similar set up back in the 70's... not as radical, I have some pics posted here as well. One issue we had was rear fender travel... I'm sure you thought of it, but when setting one up I always remove the springs from the shocks and set up the rear fender from there. Your fab work is cool... I've never had a shop with a jig of any sorts for doing any neck work. One area I also would readdress if I ever go in that deep again... would be to add a little more room, over stock, at the battery compartment area. Even tho my bike is custom I still like to run a full suite of electrics... pretty much anyways. Currently doing some R&D on a new battery box, so I'll definitely be watching what you guys are doing. I'll post some pics and show you guys whgat I've got. Did a Foam board Mock-up to make sure I clear chain guard clearance and such. As you guys know you gotta think about it all and test it... before it's pretty and painted.
Hey nice work for sure... got a cousin in Sydney that's recently started riding... mature bloke like us. Would love to get him on an XS.
Cheers
|
|
KAMAKAZEE
Full Member
RIDE HARD RIDE FREE
Posts: 196
|
Post by KAMAKAZEE on Sept 20, 2012 20:48:55 GMT -5
Definitely intense... I did a similar set up back in the 70's... not as radical, I have some pics posted here as well. One issue we had was rear fender travel... I'm sure you thought of it, but when setting one up I always remove the springs from the shocks and set up the rear fender from there. Your fab work is cool... I've never had a shop with a jig of any sorts for doing any neck work. One area I also would readdress if I ever go in that deep again... would be to add a little more room, over stock, at the battery compartment area. Even tho my bike is custom I still like to run a full suite of electrics... pretty much anyways. Currently doing some R&D on a new battery box, so I'll definitely be watching what you guys are doing. I'll post some pics and show you guys whgat I've got. Did a Foam board Mock-up to make sure I clear chain guard clearance and such. As you guys know you gotta think about it all and test it... before it's pretty and painted. Hey nice work for sure... got a cousin in Sydney that's recently started riding... mature bloke like us. Would love to get him on an XS. Cheers I myself have not done the frame mods. They have all been done by Andrew and his crew down in South Australia at the Chopper Shed the best old school Chopper workshop in Australia The Chopper Shed www.thechoppershed.com/Choppers Australia Forum www.choppersaustralia.com/forum/Good luck with getting your cousin in Sydney onto an XS650 the prices of them here in Australia, are starting to really climb high for a good one. People are starting to realize what a great motorcycle they really were. Much like the K series Honda 750/4's and the Kawasaki Z1 900's |
|
|
|
Post by XS Rod on Sept 21, 2012 8:34:30 GMT -5
I sent him the link to this thread... he told me he's got his eyes on a Trumpet T100 I think it was freedesktopwallpapers4u.com/img-triumph-bonneville-t100-2005-wallpaper-01-6286.htmnice looking bike for sure... I've heard some issues reqarding Quality Control... could be just blah blah blah. The Bonneville was the first bike i stared at... in complete frikkin awe. At work now but will check out your links. Cheers mate... and YO! |
|