


Post by richard on May 19, 2010 23:43:18 GMT -5
Here are a few pics of the valve job I stared today on my XS1B. I am still waiting on valve stem seals but I thought I would see how far I could get. The valve and seats were all pitted so I suspect that none of them were sealing very well. That would account for my low compression.
I bought I had a C-Type valve compressor but it didn’t seem to be large enough so I decided to make a spring compressor from a 9 inch C clamp. I just ground the stationary end down flat and the drilled it out with a 5/8 drill bit. It worked pretty well and the valve keepers were easy to get out. I will say though that the keepers were on the exhaust valves pretty tight and snapped as they came lose.

This is how the end the looks as I removed one set of keepers. I was very careful to keep the screw end of the clamp dead center on the valve just in case. I didn’t want to deflect the neck of the valve at all which would ruin it. They are pretty hard but it always helps if your careful when forcing something.

Before I started this project I made a organizer for the valves and springs out of some left over 1 X 12 I had around. Then a just drilled some holes into it to hold the valve stems. Next I inserted some dowels into the holes to set the spring on. The nice thing about this is since it is just going to be discard when you’re done so you can write all over it to keep track of things. I used to use a 2X4 made up like this for V8 heads before I had the money to just send them off.

This is the valves as I stuck in the block. You can see the notes I wrote with a felt pen so I could remeber where they go.

This is the intake valve which appeared to be leaking the worst. It has some wear that concerned me but I’ll just have to see if it will lap and if it doesn’t I'll replace it.
 (I decided to have a machine shop look at the valve and figured out that it is bent so I'll have to replace it. When got the bike it ran but the timing was way advance. I kind of suspected it might have jumped time. The pistons don't show any signs of a strike but I am replacing them anyway. I guess I'm lucky this wasn't much worse and now I'm glad I decided to replace the cam chain before riding it very much. This bike had a slight clicking sound from the start I figured it was the master link on the timing chain passing over vain between the cylinders but now it occurs to me in might have been the valve contacting the piston.)

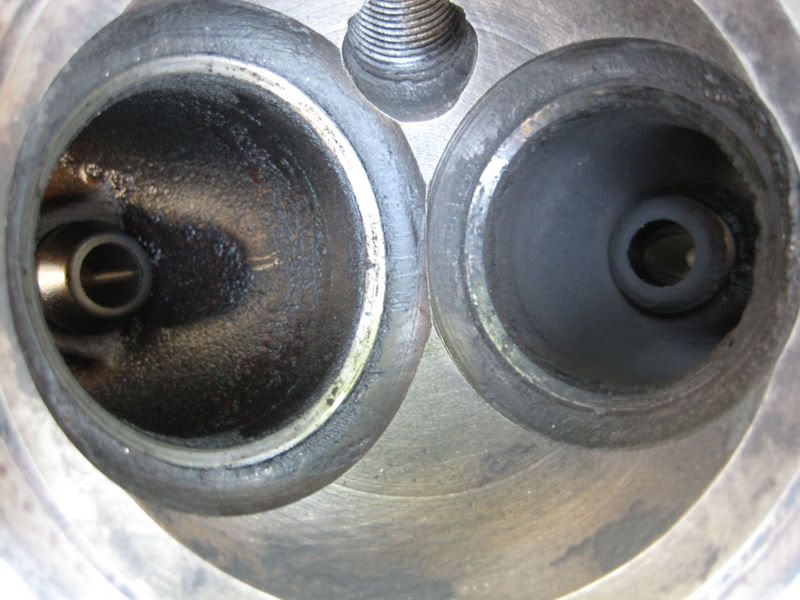
This it the seat it came out ot which is very pitted. the others were pitted but not as bad.

This is the port as I started to clean it up

and this it the two valve seats on the one side pitted as can be.
I have three grades of grinding compound it will be interesting to see if I can lap those pits out. I'm kind of wondering at this point if I shouldn’t just have them ground. It will depend on how much progress I make with the course grade compound. There is plenty of seat left there which for me was a relief and the valve didn’t look too bad.
Well that’s it for now I’ll post more later when I get the chance.
I hope you enjoyed the post.
Richard
I bought I had a C-Type valve compressor but it didn’t seem to be large enough so I decided to make a spring compressor from a 9 inch C clamp. I just ground the stationary end down flat and the drilled it out with a 5/8 drill bit. It worked pretty well and the valve keepers were easy to get out. I will say though that the keepers were on the exhaust valves pretty tight and snapped as they came lose.
This is how the end the looks as I removed one set of keepers. I was very careful to keep the screw end of the clamp dead center on the valve just in case. I didn’t want to deflect the neck of the valve at all which would ruin it. They are pretty hard but it always helps if your careful when forcing something.
Before I started this project I made a organizer for the valves and springs out of some left over 1 X 12 I had around. Then a just drilled some holes into it to hold the valve stems. Next I inserted some dowels into the holes to set the spring on. The nice thing about this is since it is just going to be discard when you’re done so you can write all over it to keep track of things. I used to use a 2X4 made up like this for V8 heads before I had the money to just send them off.
This is the valves as I stuck in the block. You can see the notes I wrote with a felt pen so I could remeber where they go.
This is the intake valve which appeared to be leaking the worst. It has some wear that concerned me but I’ll just have to see if it will lap and if it doesn’t I'll replace it.
 (I decided to have a machine shop look at the valve and figured out that it is bent so I'll have to replace it. When got the bike it ran but the timing was way advance. I kind of suspected it might have jumped time. The pistons don't show any signs of a strike but I am replacing them anyway. I guess I'm lucky this wasn't much worse and now I'm glad I decided to replace the cam chain before riding it very much. This bike had a slight clicking sound from the start I figured it was the master link on the timing chain passing over vain between the cylinders but now it occurs to me in might have been the valve contacting the piston.)
This it the seat it came out ot which is very pitted. the others were pitted but not as bad.
This is the port as I started to clean it up
and this it the two valve seats on the one side pitted as can be.
I have three grades of grinding compound it will be interesting to see if I can lap those pits out. I'm kind of wondering at this point if I shouldn’t just have them ground. It will depend on how much progress I make with the course grade compound. There is plenty of seat left there which for me was a relief and the valve didn’t look too bad.
Well that’s it for now I’ll post more later when I get the chance.
I hope you enjoyed the post.
Richard


