


Post by richard on Jun 8, 2010 23:00:45 GMT -5
When I bought my bike the tachometer was one the appeared to be from a DT250. The speedo was correct but looked dirty so I started looking for a correct tach for my bike. Everybody wanted $300 for a new NOS tach whch Ithought was too much. My next option was to find a used tach and put new faces on both. I have worked on Porsche instruments so I though how hard can it be?
The problem was I couldn’t find any replacement gauge faces for my bike. I because there were so few made there was just no demand. Most of the people that made them stopped or were unclear if they had the correct faces. So I decided to see if I could make them myself. I decided to make the face using use Corel Draw that I had used for years. My corel draw is old but it still does almost anything I need. Making gauge face is tedious but I was in no hurry, I just figured I would work on it when I had time.
Since I didn’t know what a correct Tach and looked like I had to buy several to experiment on there is a big difference between the gages on a XS1 and XS2 even though they look the same to most people. The problem was everything I got was faded and the color is still something I’m trying to work out.
Here is a pic of some of the gauges I’m working on.

The upper left gauge is an XS1 speedo I picked up cheap off Ebay, I was going to open it up but is was in such good shape I decided to save it and maybe sell it later andter I had what I wanted and it was a good pattern to start with. I used it to get an idea of the correct font on the XS1B. There is a slight difference between the fonts on the XS1 and XS2 I am picky enough to notice the difference so I had to have XS2 gauges to sort out the difference. The top right Tach is the one that came from my bike. It looks like a DT250 tach to me. I used to have a DT1 it looked the same. I figured to use the DT1 tach for my first try so I pried the ring off with a small screw driver then serviced the movment and replaced the face with the new one I made for it. The old face plate has to be perfectly clean before the ne face can be put on.
I used a laser printer to print the face and 3M Super 77 spray adhesive to attach the face to the cleaned plate, then I trimmed it with an Exacto knife and super glued the red and blue back on. I used epoxy for the light tubes on the back side.
Let me say you have to be really patient with this kind of stuff. It can’t be rushed or you end up with something that just doesn’t look right. I uses a high resolution image for the face plate prints and a laser printer so the moisture wouldn’t affect the ink. High resolution because I wanted the faces to be sharp and have crisp fonts and markings.
The lower gauge set is one I bought that came from an XS2. You can see how faded it looks. A little later I found a better XS2 tach that is much darker to the point of being almost black with a greenish gray tint. I think the color is pretty close to what it should be. I'll have to see an NOS gage to know for sure.
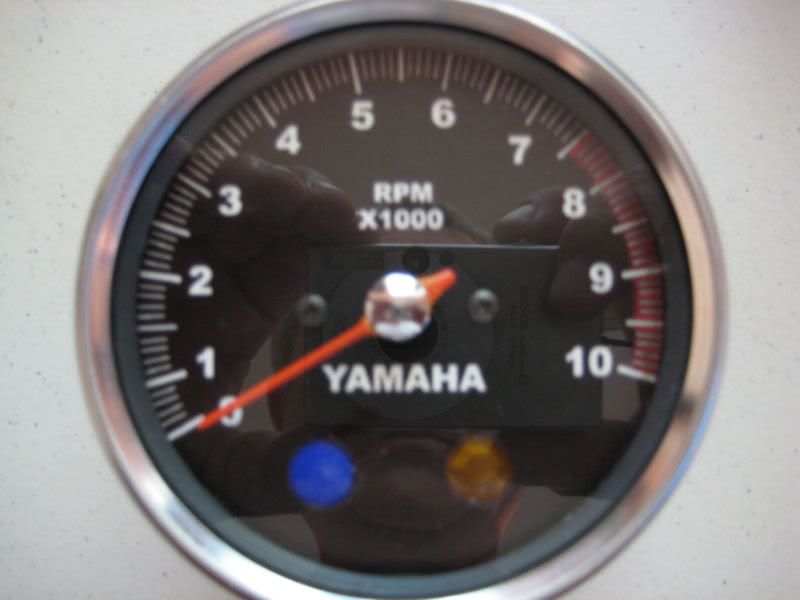
This above is another picture of the DT1 tach with the new face plate and I painted the needle with some red paint. It works just fine now but it's not what came with the bike.
I'm sure you guys all know this about wearing gloves. I always use latex gloves when working on stuff like this because if you don't sure enough there will be a big fingerprint dead center inside the glass and you'll only notice it after it's sealed up nice an tight. Those glass rings can only take so much so if you have to take it back off your pressing your luck with that glass.
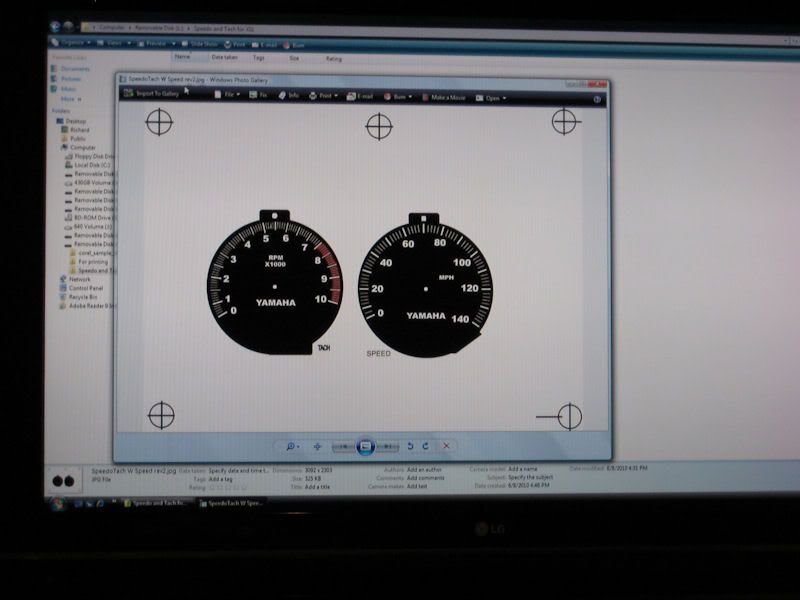
This is my design for the SX1B it's pretty close to what it should be but I am still working on it. I have hours into getting all the correct spacing and layout but it's getting there.
I hope you found this interesting
Oh! the reason I am working on this now is because I'm waiting on parts for my top end rebuild. If I have time later I'll post some pictures of how to get the ring off and what it envolves. There are other blogs on the net about how to do that I just don't have the links at the moment.
Thanks Richard
The problem was I couldn’t find any replacement gauge faces for my bike. I because there were so few made there was just no demand. Most of the people that made them stopped or were unclear if they had the correct faces. So I decided to see if I could make them myself. I decided to make the face using use Corel Draw that I had used for years. My corel draw is old but it still does almost anything I need. Making gauge face is tedious but I was in no hurry, I just figured I would work on it when I had time.
Since I didn’t know what a correct Tach and looked like I had to buy several to experiment on there is a big difference between the gages on a XS1 and XS2 even though they look the same to most people. The problem was everything I got was faded and the color is still something I’m trying to work out.
Here is a pic of some of the gauges I’m working on.
The upper left gauge is an XS1 speedo I picked up cheap off Ebay, I was going to open it up but is was in such good shape I decided to save it and maybe sell it later andter I had what I wanted and it was a good pattern to start with. I used it to get an idea of the correct font on the XS1B. There is a slight difference between the fonts on the XS1 and XS2 I am picky enough to notice the difference so I had to have XS2 gauges to sort out the difference. The top right Tach is the one that came from my bike. It looks like a DT250 tach to me. I used to have a DT1 it looked the same. I figured to use the DT1 tach for my first try so I pried the ring off with a small screw driver then serviced the movment and replaced the face with the new one I made for it. The old face plate has to be perfectly clean before the ne face can be put on.
I used a laser printer to print the face and 3M Super 77 spray adhesive to attach the face to the cleaned plate, then I trimmed it with an Exacto knife and super glued the red and blue back on. I used epoxy for the light tubes on the back side.
Let me say you have to be really patient with this kind of stuff. It can’t be rushed or you end up with something that just doesn’t look right. I uses a high resolution image for the face plate prints and a laser printer so the moisture wouldn’t affect the ink. High resolution because I wanted the faces to be sharp and have crisp fonts and markings.
The lower gauge set is one I bought that came from an XS2. You can see how faded it looks. A little later I found a better XS2 tach that is much darker to the point of being almost black with a greenish gray tint. I think the color is pretty close to what it should be. I'll have to see an NOS gage to know for sure.
This above is another picture of the DT1 tach with the new face plate and I painted the needle with some red paint. It works just fine now but it's not what came with the bike.
I'm sure you guys all know this about wearing gloves. I always use latex gloves when working on stuff like this because if you don't sure enough there will be a big fingerprint dead center inside the glass and you'll only notice it after it's sealed up nice an tight. Those glass rings can only take so much so if you have to take it back off your pressing your luck with that glass.
This is my design for the SX1B it's pretty close to what it should be but I am still working on it. I have hours into getting all the correct spacing and layout but it's getting there.
I hope you found this interesting
Oh! the reason I am working on this now is because I'm waiting on parts for my top end rebuild. If I have time later I'll post some pictures of how to get the ring off and what it envolves. There are other blogs on the net about how to do that I just don't have the links at the moment.
Thanks Richard


